Your solar panels are only as good as where they’re pointed. A panel is essentially a flat window that converts sunlight into electricity — the more directly that window faces the sun, the more power it makes. The hardware that holds the panel in place — the mounting bracket or racking system — controls that angle, and getting it wrong is one of the most common and quietly expensive mistakes in solar installations. Whether you’re bolting a couple of panels to an RV roof, commissioning a flush residential array, or laying out a ground-mounted system on a commercial property, the tilt angle (how steeply the panel faces upward) and the azimuth (which compass direction it faces) are the two variables that determine how many kilowatt-hours you actually harvest each year. This guide walks through the three main mounting contexts — RV/mobile, rooftop residential, and ground-mount — explains how each constrains your angle options, and gives you the decision framework to evaluate any bracket system before you buy or specify it.
| EDITOR'S PICK[ECO-WORTHY Upgraded Solar Groun…](https://www.amazon.com/dp/B0831DDS9W?tag=greenflower20-20) | Mid-tier[Renogy 4 Sets of Solar Panel Mo…](https://www.amazon.com/dp/B00T561U0E?tag=greenflower20-20) | Budget pick[Renogy Solar Panel Mounting Z B…](https://www.amazon.com/dp/B00W49ZPPK?tag=greenflower20-20) | |
|---|---|---|---|
| Mount Type | Ground | Z Bracket | Z Bracket |
| Material | — | Aluminum | Aluminum |
| Corrosion Res. | — | ✓ | ✓ |
| Panel Support | 200W-400W | — | — |
| Set Quantity | — | 4 | 4 |
| Price | $113.04 | $32.29 | $9.34 |
| See on Amazon → | See on Amazon → | See on Amazon → |
Why Tilt Angle Is the Lever Most People Undervalue
Here’s the quick physics: in the continental United States, the sun traces a path across the southern sky (in the northern hemisphere). A panel laid flat on a horizontal surface catches the sun best at solar noon in summer, but performs poorly in winter when the sun is low on the horizon. Tilt the panel toward the south at an angle roughly equal to your site’s latitude, and you hit a near-optimal year-round average.
By the numbers:
| Tilt scenario (40° N latitude) | Estimated annual yield loss vs. optimal |
|---|---|
| Flat (0° tilt) | ~15–20% |
| Optimal fixed tilt (~35–40°) | baseline (0% loss) |
| Steep tilt (60°+) | ~8–12% |
| Wrong azimuth (due east or west) | ~15–20% |
Source: NREL PVWatts Calculator Documentation, Version 8. Values are indicative for a standard poly/mono panel; exact figures vary by location and shading profile.
The takeaway: a panel at the wrong angle or facing the wrong direction can quietly erase 15–25% of your system’s annual output before you’ve shipped a single kilowatt-hour. At residential scale, that’s the difference between a system that covers your bill and one that doesn’t. At commercial scale with a 500 kW array, that loss compounds into serious money over a 25-year asset life.
The DOE’s Solar Energy Systems mounting guidance reinforces this point, noting that fixed-tilt systems should be optimized for annual average output — not peak summer output — unless the owner has a time-of-use rate structure that rewards summer afternoon generation more heavily.
RV and Mobile Mounts: The Tilt Angle Trade-Off You Actually Face
On an RV, van, or boat, the mounting decision is almost entirely constrained by aerodynamics and structural weight limits — and those constraints push you toward a near-flat profile that is sub-optimal for energy yield.
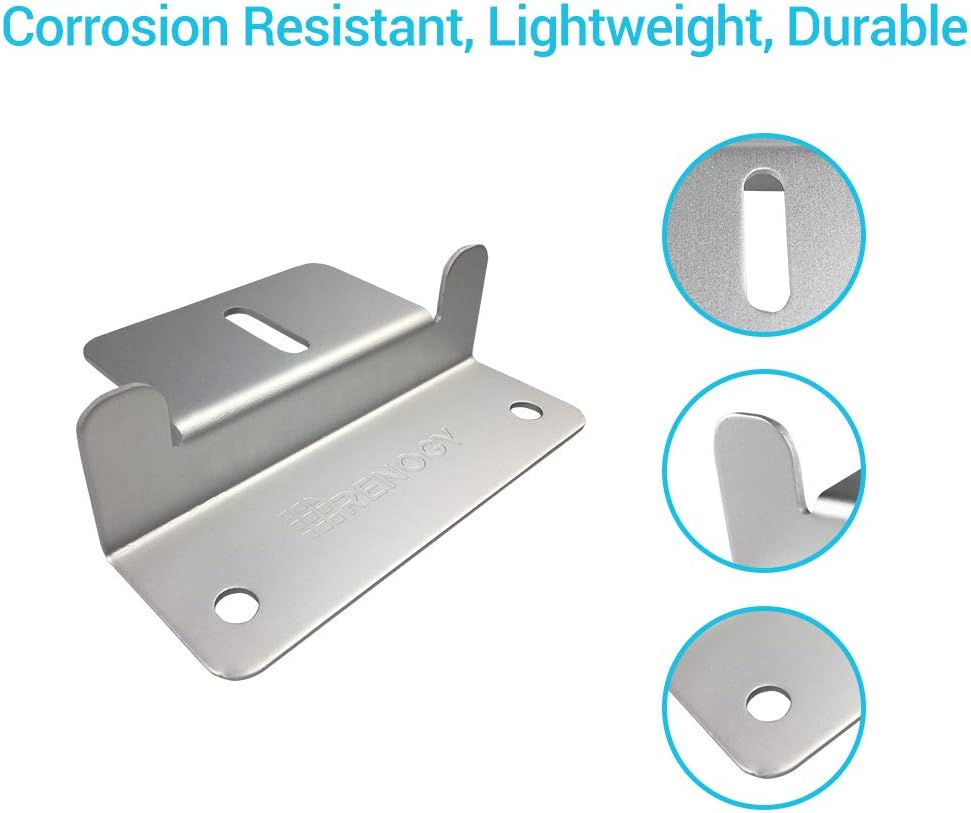
Most RV roof rails and Z-bracket systems (the low-profile aluminum channel brackets that attach directly to the panel’s frame) keep panels within 5–10° of horizontal. That’s not laziness — it’s physics. A panel raised to a 30° tilt on a Class A motorhome at highway speeds creates significant wind load, increases the risk of delamination at the bracket contact points, and can exceed the roof’s load-bearing rating when dynamic pressure is factored in. Solar Power World Online’s 2025 racking market overview notes that RV-specific mounting manufacturers consistently engineer for low-profile deployment specifically because the vehicle’s structural ceiling is the binding constraint, not energy optimization.
What this means for your decision:
-
If the RV is mostly stationary (seasonal camping, workamper setup, or a permanent tiny-home-style deployment): adjustable tilt brackets that let you prop the panel up to 25–35° while parked are worth the added cost and weight. Several bracket systems designed for this use case include fold-out legs or pivot hinges that can be repositioned when you stop moving. Owners report meaningful output improvements — often 20–30% more daily watt-hours in winter months at mid-latitudes — when they tilt panels toward the sun while camped.
-
If the RV moves frequently: flat-mount or near-flat Z-brackets with good corrosion-resistant hardware (anodized aluminum or 304 stainless steel fasteners minimum) are the correct call. Optimize panel count and watt-hours of battery storage instead of chasing tilt angle.
-
Roof penetrations vs. no-penetrations: some RV owners use adhesive-mount or non-penetrating systems to avoid drilling into the roof membrane. These are structurally weaker and not suitable for anything above 100W per mount point; for serious power needs (400W+), bolted brackets with proper sealant are the standard the industry recommends.
Rooftop Residential Mounts: Working Within What You Have
On a fixed residential roof, you don’t get to choose your tilt angle — you choose to accept your roof’s pitch or you pay for a more complex racking solution. Most American residential roofs pitch at 4:12 to 6:12 (roughly 18–27°), which is actually close to optimal for latitudes between 30°N and 45°N. The bigger variable is usually azimuth: a south-facing roof slope at 20° tilt outperforms an east- or west-facing slope by a margin that EnergySage’s orientation and tilt guidance puts at roughly 15–20% annual yield.
Standard flush-mount racking (rail-based systems like IronRidge XR or Unirac SolarMount) keeps panels parallel to the roof surface at whatever angle the roof provides. These systems are load-tested to meet local wind and snow codes, are the fastest to install, and carry the lowest labor cost. If your roof faces south within about 30° east or west and pitches between 15° and 35°, flush-mount is likely your correct answer.
Tilt-up or adjustable roof mounts add 2–8° of additional tilt above the roof plane. They’re most useful when your roof pitch is very shallow (under 10°) and you need to improve drainage across the panel surface as well as gain yield. The tradeoff is increased wind load and, on residential projects, a more complex engineering review for permit.
Key practitioner decision points for residential:
-
Shading first, tilt second. A perfectly tilted panel with partial shading from a chimney or tree will underperform a slightly sub-optimally tilted unshaded panel. Run a shading analysis (via NREL’s PVWatts or a site-specific tool) before optimizing tilt.
-
Roof material compatibility. The bracket system must be rated for your roof material — composition shingle, tile, metal standing seam, and TPO membrane each require different attachment hardware. Mis-matched penetrations are the leading source of warranty-voiding roof damage on residential installs. Solar Power World Online regularly flags installer callbacks driven by incorrect flashing or tile hook selection.
-
Rail direction and wind design. Landscape (panel long side horizontal) vs. portrait orientation affects rail spacing and the wind uplift engineering. Most residential systems default to portrait on railed systems; newer rail-less or module-level attachment systems like Unirac’s RM Rapid Mount line permit landscape with fewer parts.
Ground Mounts: Where You Finally Get to Optimize
Ground-mounted systems are the one context where you can actually engineer your tilt angle from scratch — and that freedom makes this the highest-stakes bracket decision.
Fixed-tilt ground mounts — steel or aluminum pipe-and-strut frames driven into the ground or set on ballasted concrete — are the workhorse for most commercial and prosumer ground arrays. You set the angle during design, and it never changes. PV Magazine’s 2024 fixed-vs.-tracking yield comparison found that for most U.S. sites, a fixed-tilt system optimized for annual production (tilt ≈ latitude minus 5–10°) captures about 85–90% of the theoretical maximum yield of a single-axis tracker at roughly 30–40% of the tracker’s installed cost.
Single-axis trackers rotate the panel east-to-west throughout the day, following the sun’s daily arc. They’re the dominant technology in utility-scale ground mount deployments and increasingly common in commercial C&I projects above roughly 250 kW. The economics depend heavily on your electricity rate structure: if you’re selling into a wholesale market or have a time-of-use tariff that values afternoon peak generation, trackers deliver disproportionate financial return during those hours.
Dual-axis trackers follow both daily and seasonal sun movement. PV Magazine’s analysis consistently shows dual-axis systems add only 5–10% more yield over single-axis at substantially higher O&M complexity — making them rarely cost-effective in commercial contexts outside specialized applications (concentrating solar, research installations).
Ground anchor systems matter as much as the rack itself. Driven helical piles are faster and less concrete-intensive than poured footings; they’re the preferred choice where soil conditions permit. Ballasted systems (concrete blocks, no ground penetration) are used for flat-roof commercial or brownfield sites where penetration is restricted. The DOE’s mounting guidance notes that the wind uplift design for ground arrays is typically more demanding than rooftop because panels are fully exposed — always verify that your racking manufacturer’s engineering stamps cover your site’s wind zone (ASCE 7-22 is the current baseline standard for U.S. structural design).
The Decision Framework: If X, Then Y
Here’s the practitioner shorthand for working through a mounting and tilt decision under real project constraints:
If you’re doing an RV or mobile installation and the vehicle moves regularly → flat or near-flat Z-brackets or low-profile rail mounts, stainless fasteners, no-penetration adhesive only for panels under 100W. Accept the yield hit; compensate with battery capacity.
If the RV is mostly stationary → invest in adjustable tilt brackets that can be repositioned on-site. The yield gain in off-season months is real and well-documented by owners in extended-stay contexts.
If you’re doing a residential rooftop install → run shading analysis before worrying about tilt. Accept your roof pitch if it’s between 15–35° and faces within 30° of south. Spend the bracket budget on code-compliant flashing and material-appropriate attachment, not tilt optimization hardware.
If your residential roof faces east or west and you have budget flexibility → a ground mount or carport structure on the same property may outperform a complex rooftop tilt system at lower total cost and with easier future maintenance access.
If you’re specifying a commercial ground mount under 250 kW → fixed-tilt at latitude minus 5–10°, engineered helical piles where soil allows, and standard galvanized or aluminum racking. Run the fixed-tilt vs. tracker NPV comparison only if your offtake structure rewards peak-hour generation.
If your commercial ground mount is above 250 kW and your tariff rewards afternoon peak → single-axis trackers enter the economic conversation. Get a site-specific tracker yield model (NREL’s SAM — System Advisor Model — is the industry-standard free tool for this comparison) and compare 20-year NPV at your actual electricity rate, not the tracker vendor’s assumptions.
The bracket is never just hardware. It’s the mechanism that determines whether your panels spend 25 years pointed at the sun or pointed at the sky — and the difference between those two outcomes is real money, every year, for the life of the system.